|
"Fake radiosity"
During the summer of 2001 I played around with Maya- just for fun - to produce global illumination images using the built in renderer. The basic idea is not new, however I had to solve several problems concerning the application. I published my experiences at the CESCG conference in 2002 (paper with html version here). The main goal was to calculate the diffuse and glossy interreflections, which is not supported in the standard Maya renderer. The ray tracing algorithm handles only mirror like materials, and local illumination doesn't take into account any intersurface reflections. The basic idea (which is not mine): mirror like surfaces with microscopic bumps behave just like diffuse surfaces. This is correct, since these bumps reflect the light in all directions. To generate microscopic features I used the built in procedural Brownian texture as bump map. The bump depth parameter controlled the diffuseness of the material.
Different bump depth values.
The diffuse behavior, the color bleeding and the soft shadows change more and more as the bump is deeper. The method works for mirror like, glossy and diffuse surfaces as well, that is why the title is "Fake Radiosity" instead of Fake Radiosity. Radiosity handles ONLY diffuse surfaces! It is not fake, either, since the illumination is calculated without a some tricks. When applying this idea in practice the lighting and rendering is slightly different than usual. All the materials are black and the reflectivity parameter - a non-zero value - controls the actual color. The bump map should be a high frequency noise. The bump depth controls how shiny or diffuse the surface is. The lighting is also special: no regular point, spot or directional lights should be used. The light sources are surfaces with self illumination (incandescence). This way we can use are lights and we have soft shadows as well. (This way of lighting is not cheating: in real world we see the light - coming from illuminating objects - reflected to our eyes. The real cheat is the local illumination, which uses those abstract light sources which are not even visible in the reflections.)
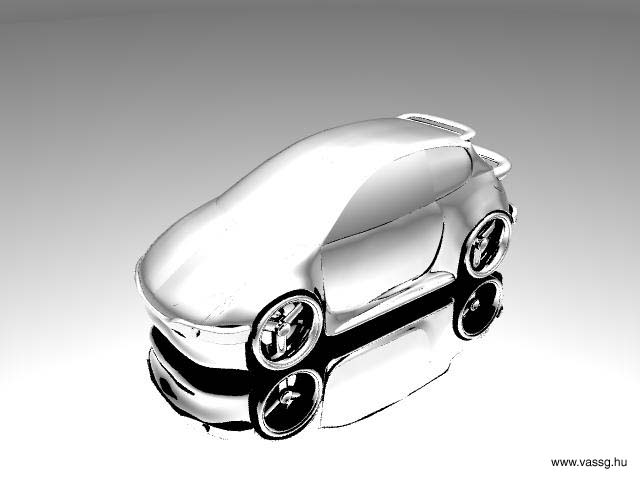
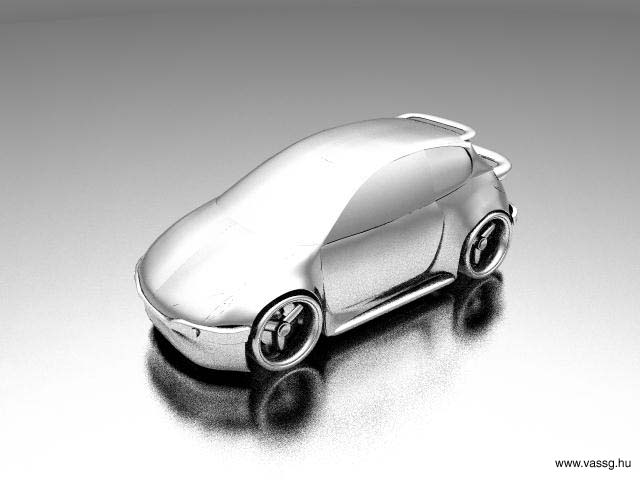
Application if the method with different bump depth values. The light source is a half sphere with self illumination.
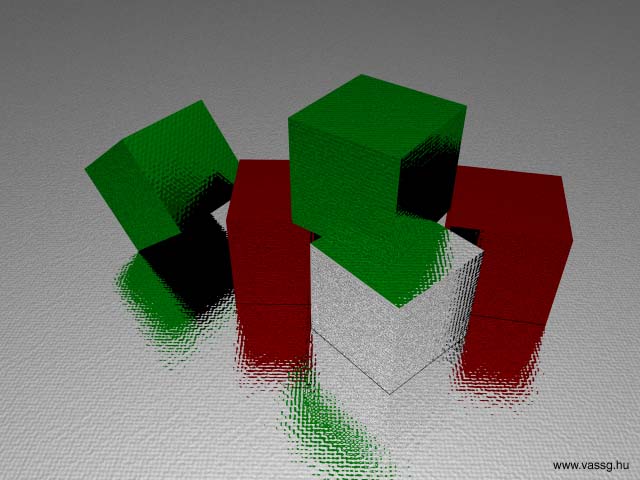
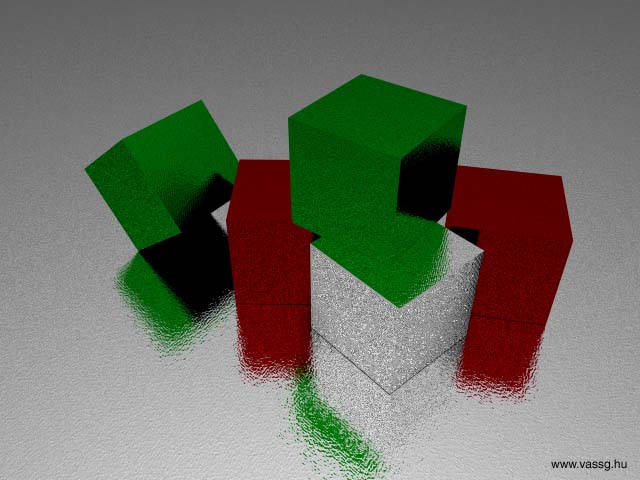
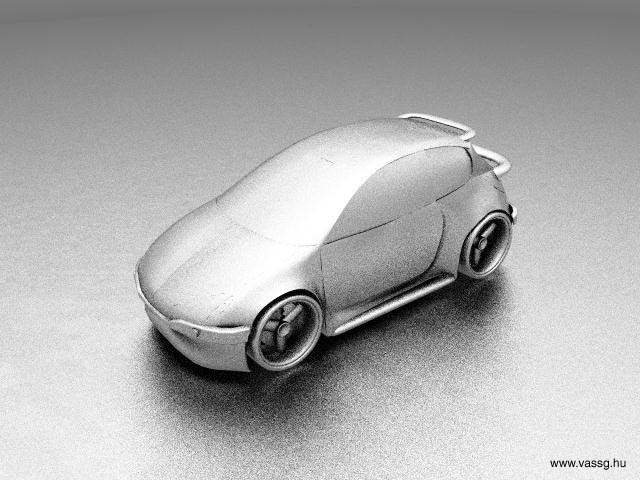
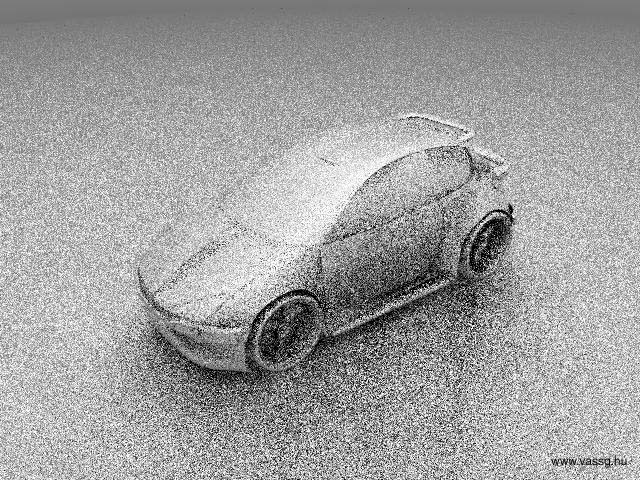
Rendering is the most tricky step. If we used the regular set up we would get something like this:
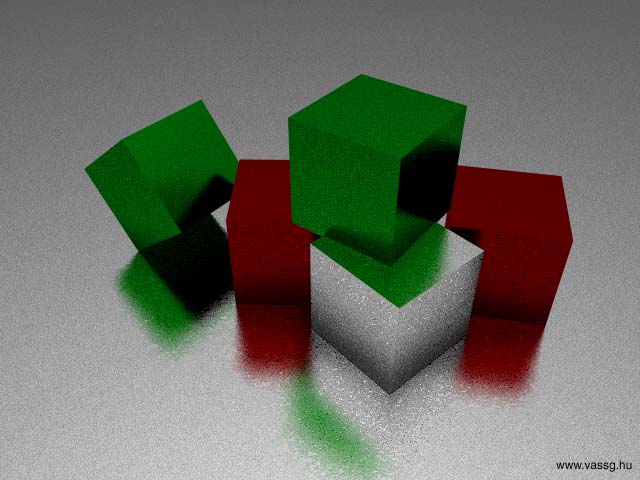
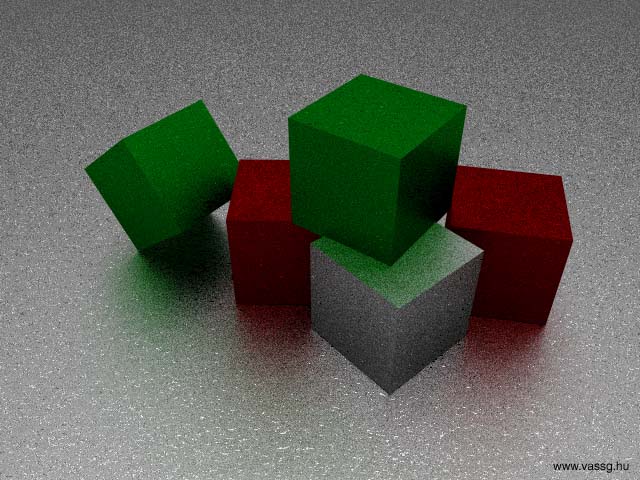
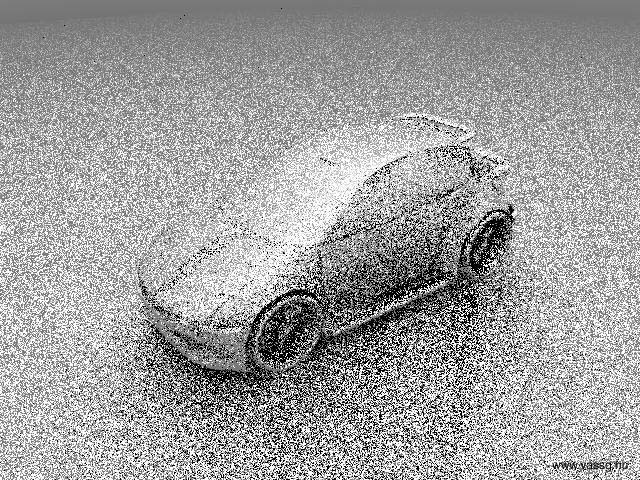
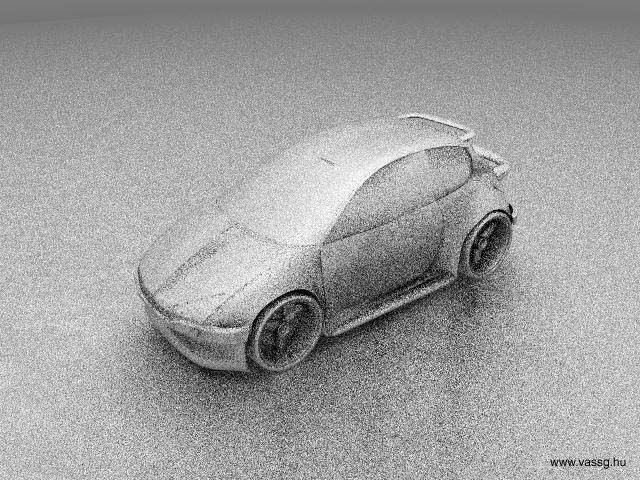
This is the sad result because under standard conditions 1 or 2 samples (rays) are calculated for each pixel. To get a nice result many samples are needed for each pixel. (We want the rays to be reflected in many different directions. If we have only a few rays the result will be far from the real value.) Unfortunately Maya lets the number of samples to be 32 maximum. To overcome this limitation I came up with a simple trick: if we calculate many images, each with different sampling positions and average them, we get a single image with many samples per pixel. However we cannot tell Maya to have different sampling position for each frame, so my solution was to move the bump texture frame by frame. If we move it, the rays will be reflected in different direction at each frame, which is just the same as we had different sampling positions. This way we can get as many samples per pixel as we want.
This methods cannot be used in production since the rendering time is very long. The last image took 1 day to generate...Further details are in the papers.
|