|
Sacra Corona
Director: Gábor Koltay Cinematographer: Emil Novák
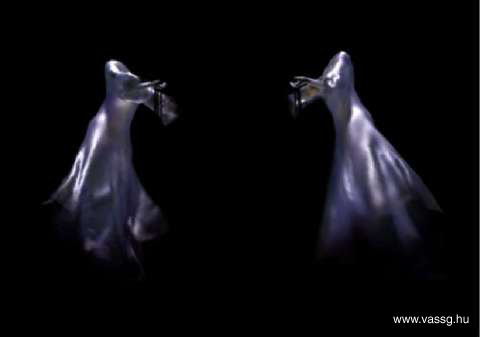
1. Crowd of troopers Gergely Cziráki: rotoscoping
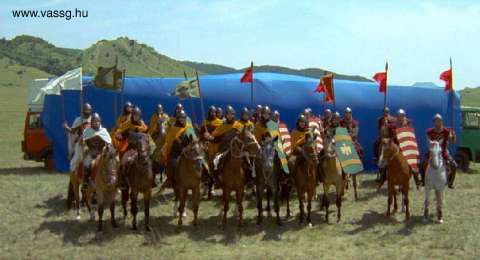
This is an approximately 20 seconds long scene in which we had to generate a cavalry troop based on a material where 3 to 20 troopers were shoot in front of blue background in different costumes and setting. Phase 0 - which lasted longest of all - was the preparation of the shot material, which meant the masking (rotoscoping) of the riders by hand on the shots where the blue background was not suitable for keying. Unfortunately, this painful work can't be avoided even at the greatest Hollywood productions (although that's where they are really skilled in making blue backgrounds). First layer in the composition was done by putting cavalry troops behind each other spread in time and space in order to generate a crowd of about 40 to 50. Looking relatively large on the screen, these troopers could not be used for more than two or three times. That was when it became apparent that it is impossible to generate the amount of people required (some 1,000 or 2,000) by hand in the phase of compositing. We had to come up with an automated procedure to multiply a great number of troopers. This problem was solved by the method used in the movie Gladiator (of course, on a slightly more modest level). Differently dressed horsemen cut out from the live plates had been dropped on some 2,000 small poly planes in Maya. Then scripts had to be made to animate riders in a way avoiding their recurrence being noticeable. Now we got an automatically generated army of 2,000 behind the 50 handmade ones. Although we had developed 3D troopers commanded by scripts, their employment proved to be unnecessary. In the phase of the final compositing the task was to assemble the rear crowd with the numerous front layers. We had to color correct everything, we blurred slightly the rear crowd and eliminated the small flaws taken place.
Original plates.
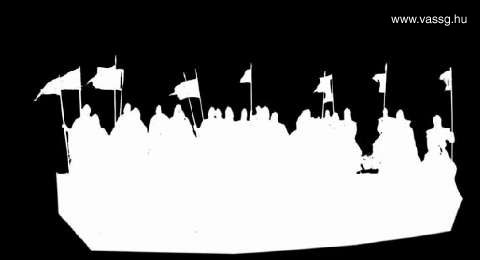
The hand painted mask.
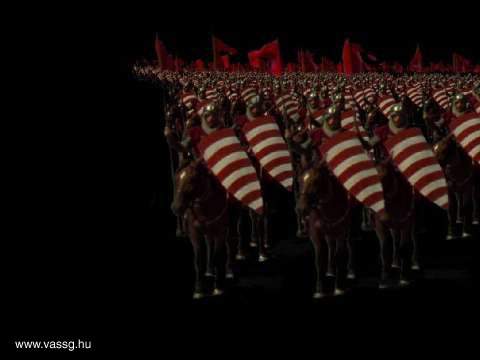
The hundreds of troopers in the rear layer were done with Maya's particle system.
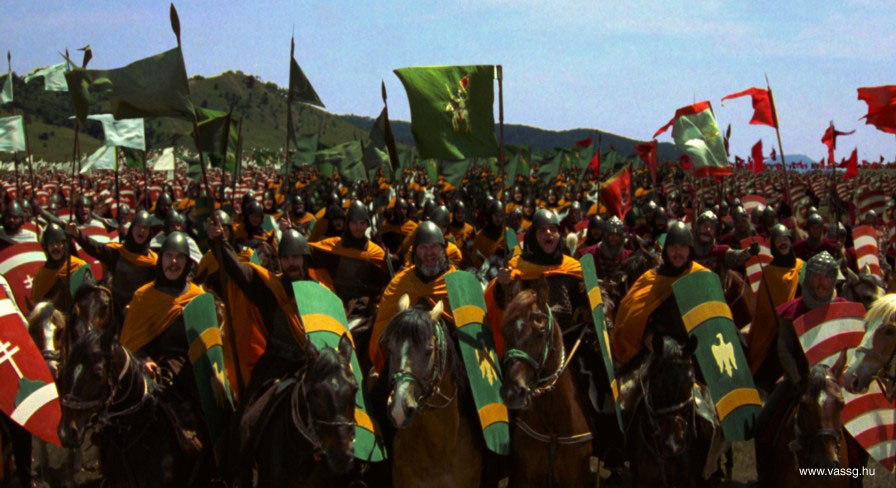
The final composit.
5.4 mb, DivX 5.0 codec or newer required, you can download it here.
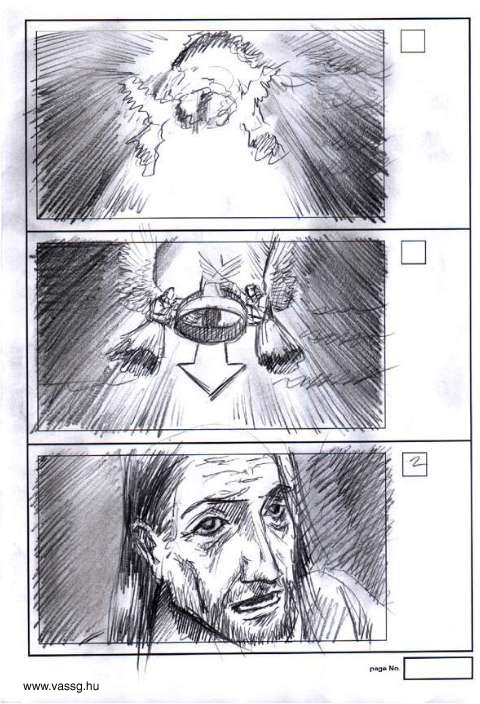
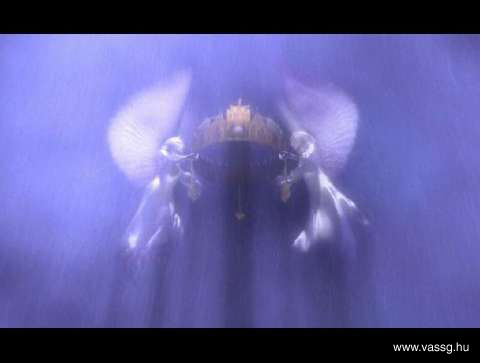
2. "Angel" miracle
Gergely Cziráki: storyboard, drawings, clouds Szabolcs Horvátth: modeling, character setup, animation, rendering Csaba Juhász: lead compositor, rendering Mátyás Szabó: clouds, rotoscoping Gergely Vass: cloth simulation, rain and cloud simulation, particles, programming
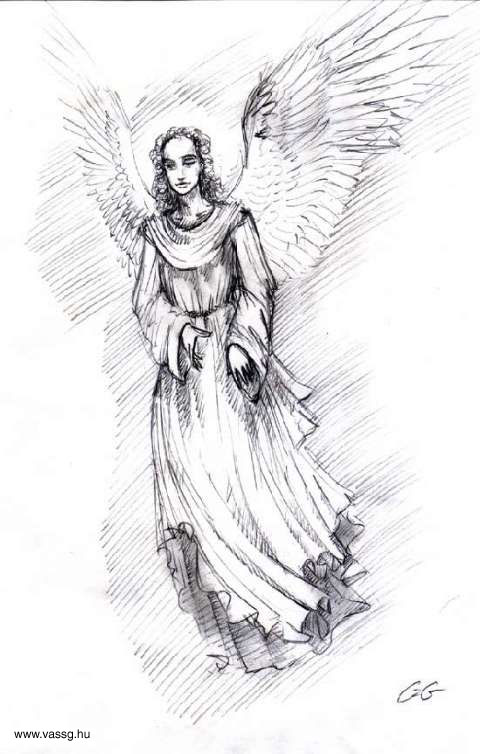
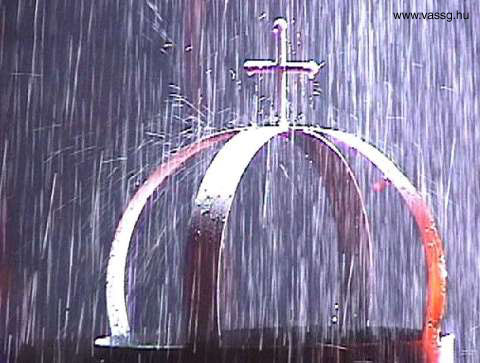
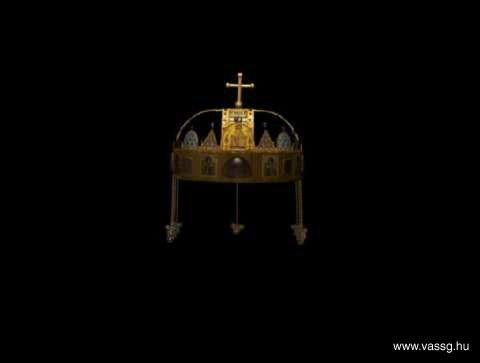
In the Angel Scene the task was to depict a vision where stormy clouds opened up and the Sacred Crown of Hungary and the two angels bringing it down appeared. Before preparing the storyboard we had collected a huge number of representations of angels from different periods. After consultations with the production we had selected Leonardo's angels to have ours be based on. Their actual modeling followed the preparation of storyboards and reference drawings.
The final look of the 3D angels was assembled from the best details of the many different designs made before the actual computer modeling. The director of the movie wanted the figure being vision-like, translucent, glassy and statuesque. Being covered by draperies, it made no harm to compose the model's body of more layers: the head, the wings, the hands and the stylized body (used for the simulation of the draperies) were made separately. The requirement of translucency made a bit difficult to assemble the figure of separate parts but finally we succeeded in merging them by generating a transparency map of its own for each model. All models were produced using subdivision surface technique which was available for Maya 2.5. We tessellated the final model into polygons for animation and rendering.
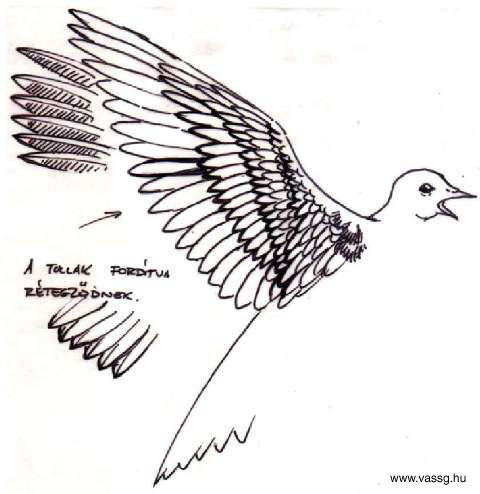
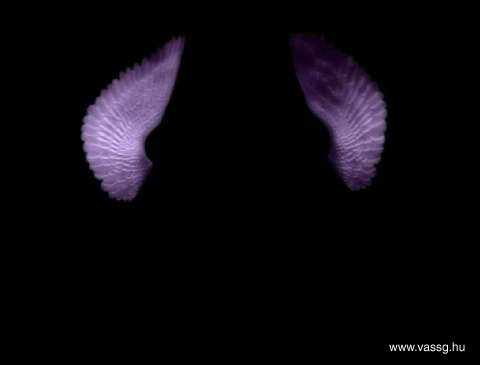
After the tryout (and scrapping) of several concepts, finally we decided to create the impression of feathers on the wings only with textures instead of geometry or displacement. Painted and drawn bump maps were used to lift feathers out of simple geometry what only differentiated between the three planes of feathers. Finally after some blurring, caused by the motion of the wings, the feathers were smooth enough. Throughout the process we always had to have in mind the fact that the final animation will not be made in PAL resolution but 2K. Working on film material every detail had to be much more elaborated than if it would have been produced for TV screen dimensions. Models were skinned using the skeletal system by Maya rigid skinning. At first there were attempts made for the proper conveyance of major muscular movements too, but later when the cloth simulation was tested, it proved to be an unnecessary overcomplication. The two particular sequence of movements what the director had dreamed up made the animation of the wings quite difficult. It could be executed with nor expressions nor blend shape morphing. The former, consisting of short scripts and mathematical expressions, resulted an animation too steady and boring, while the latter would have required separate modeling of each phase taken by the wings in the course of the sequence and morphing them between these phases, what would have required execution of some 25 or 30 different positions. This would not only have been a very hard job but would have resulted in an outcome practically unalterable afterwards. Bent backwards at the sides and the ends as set against the air, the wings had to be imagined in a coordinate system revolving in three directions at each joint.
In the case of the characters, although their movements were rather fixed (their role is that they hold the Crown straight and to descend slowly and solemnly, then look at the live actors and disappear), we wanted them to seem as lively as it is possible within the minimal compass determined by the given circumstances and, at the same time, to keep the elevated atmosphere. In order to make the animation of the figures as transparent and controllable as possible, we had collected the controls of each movement into a single node in the character setup. The skeletal system contained some movement possibilities what were finally not used at all (e. g. a reversefoot setup which had no role at all because the feet of the angels rarely touch the draperies) but due to the complexity of the model, it would have been very awkward to change the structure of the skeletal system or the constrains after skinning. Unfortunately we still could not avoid subsequent additions: several parts of the angels were prepared afterwards, such as the hair, the head and due to a modifications also the hands. We had to make new bone structure for the new parts and fasten it with orient and point constrains to follow the original ones' motion. Finally, finishing of the major animations were followed by several secondary animations, such as the streaming of the angels' hair or the swaying of the chains on the crown. Once finishing the body of the angel we could start creating the clothes. The drawings depicted the angels' robes as being long, loosely cut, cascading and fleecing in the wind. It eased the making of the dress pattern but seriously lengthened the duration of the simulation. But Maya's legendary Cloth Module facilitated the task. It took only a short time to make the shape of the dress and to set up the forces keeping it on the angels, i. e. winds and turbulences, while it took a long time to specify the parameter values of the material. The final, detailed resoluted cloth had been simulated for around six hours and was stored in a file of some 60 or 70 Mb. The high speed fall of the angels meant a serious problem in the adjustment of the winds and other forces for the cloth since it often was lashed onto their heads or shoulders.
The creation of the robes were followed by the generation of the rain. The dynamic module of Maya is also one of the best, if not The Best - so we could also work on the rain very fast and efficiently. To create the rain, we have emitted thousands of particles from above and exposed them to slight turbulence during their fall. All kinds of rain were rendered by hardware and got their final shape after compositing. But it was not only the particles - i. e. drops - falling from above what we had to create but also their interaction with the wings of the angels, the crown and the land. The concept included that real rain had to clatter on the envisioned crown and angels' head. The creation of the hitting of the crown proved the easier part for we had the opportunity to make reference videos during the shooting of the movie. The collision with the wings was much tougher, because it was impossible to detect it due to the instance copy feature of the character setup. Finally the problem was solved by tracking the surfaces of the wings with the help of an expression and creating a simple stand-in surface that follows the former. Luckily this process considerably quickened the calculation of collisions.
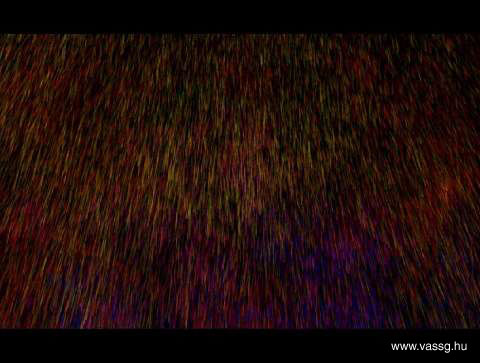
When rendering of the rain, particles of different kinds or roles were rendered with red, green and blue (RGB) colors, so we could extract three layers from one sequence during the compositing.
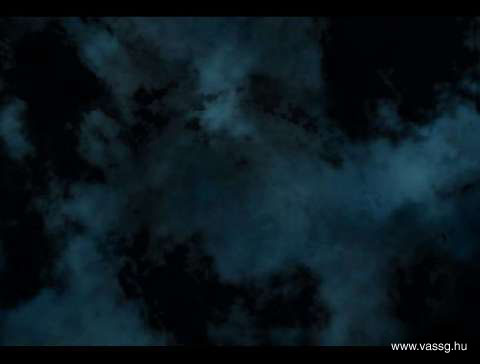
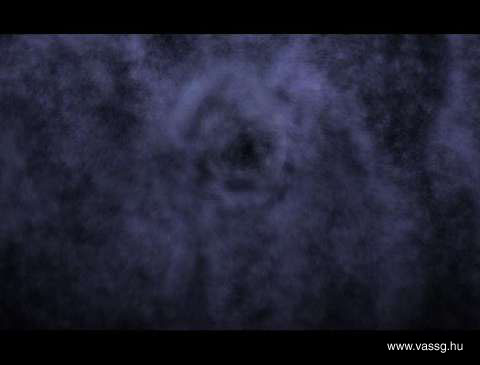
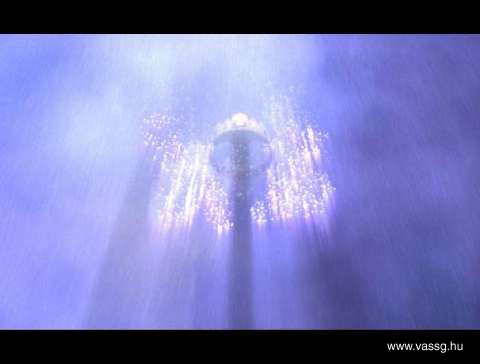
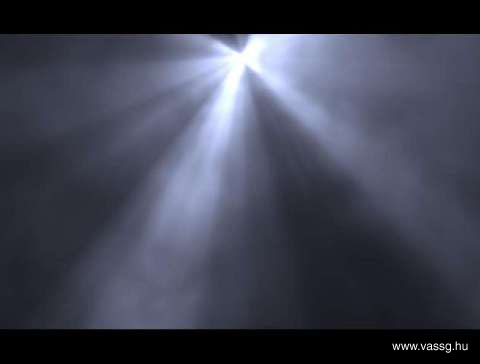
There were also several versions made for the swirling clouds. The clouds what determined the final image were made using the cloud type software-render particle of Maya. We were intended to create dark clouds with only their edges being bright. It was solved by using a twofold cloud wrap where the lower one was dark while the upper one was very light. In the scene the clouds open up and a very strong ray of light shines through the orifice, which was generated with a completely different technique. We have made a swirling particle system of about 40, 000 - 50, 000 what was exposed to a strong twisting power where the orifice was. This layer, similarly to the rain, was also made with hardware render.
Cloud particles.
A LOT of multristreak particles The bright shining particles bringing the crown and the angels down from the sky were also made with the help of the dynamic module of Maya. Here the difficulty was that the shining particle cloud had to take on the shape of angels. This problem was solved by reversing the second part of the animation so that the particles could be emitted out of the body of the angels. The reversed second part was put together with the first one - when the particles come out the cloud - during compositing.
The scene got it's final shape through the compositing of several different layers. Although separating and rendering the several layers took much time and skills, only it could provide the possibility of relatively short rerendering of the accidentally incorrect sequence. At first the whole scene was executed in video resolution and it was only after the director's approval that we started working in 2K. So the final render time of the layers were between 30 min per image and 1 sec per image. Unfortunately, even the (seemingly) most reliable programs happen to fail sometimes working in such resolution. Compositing meant in this case color correcting, timing and effecting more than 20 layers.
The "light" layer.
Crown layer.
The final look. |
4.5 mb, DivX 5.0 codec or newer required, you can download it here.