|
Cyborn music video
Gergely "CZG" Cziráki: director, design, drawing, animation, modeling
It is very hard for a new and unknown band to get popular, especially if their music is nothing like pop. In Hungary the labels do not invest much money into rock music, so the bands have no chance to have nice music videos, thus they don't make it to be on screen. The Hungarian CyBorn - playing progressive rock/metal - is exactly such a band. They wanted a full CG music video that gets the attention of the record labels and the fans. Considering the very low budget it seemed a hard job to make the video for the band. Design The design and the planning of the project was the very first step. Gergely Cziráki was the designer, storyboard artist and art director - as well as the director. The initial designs and plans were the references for the 3D modeling and animation.
The story and the characters needed to be very simple to be able to finish the project. The initial plan was to make the movie 50% CG and 50% live footage. The battle between the CG droids takes place in some sort of cyberspace, while later it turns out that the whole thing is somehow connected to the imagination of a real "programmer". To make the video attractive to the male viewers the hero is a female android. Her first attacker is a tank-like robot called Horrorbot, while the second enemy is a spider-demon. Because of the tight timeframe the last opponent turned out to be a simple skeleton-monster. All characters were developed in detail by CZG. To achieve a dynamic and stirring mood we used lot of camera and character movement and always changing lighting instead of complex environment. Each battle takes place in a different - and always simple - environment.
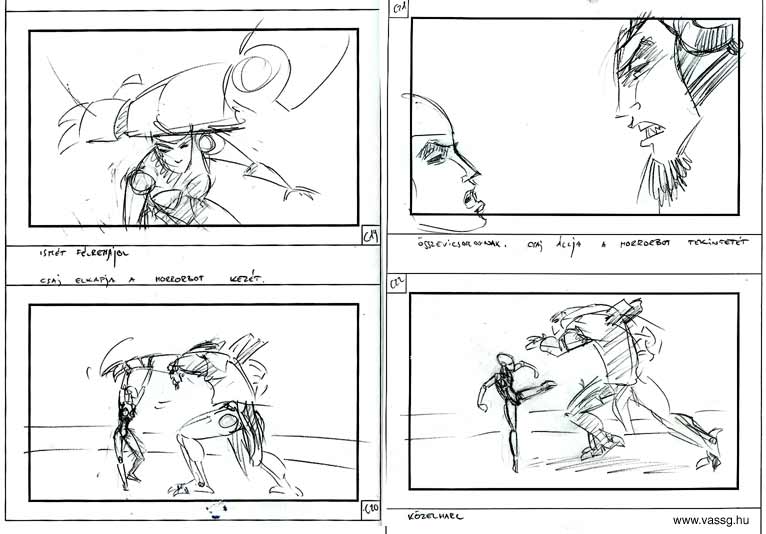
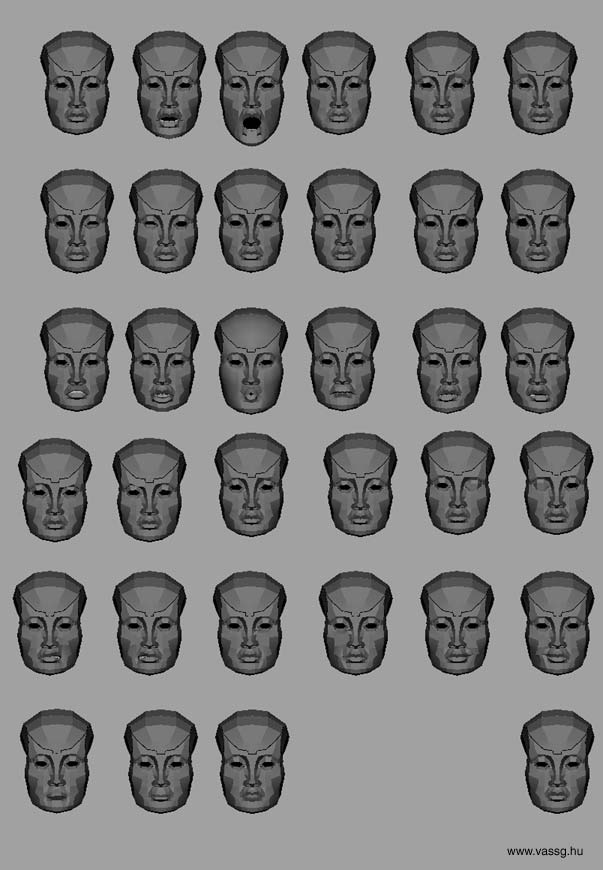
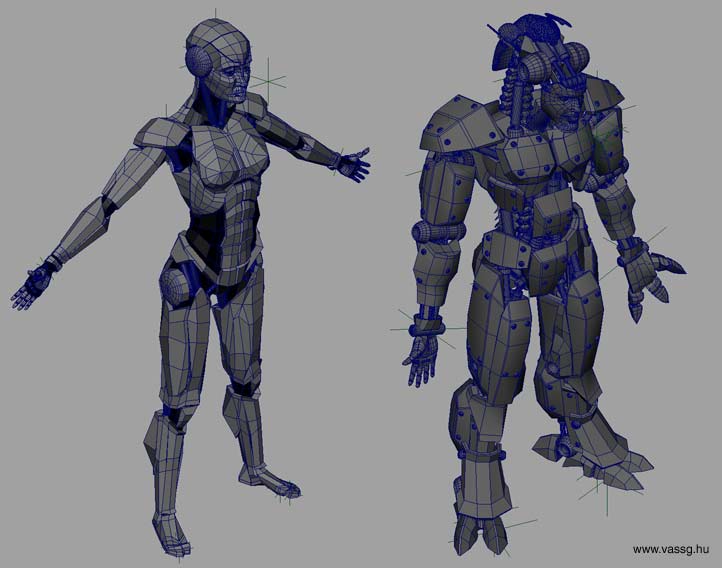
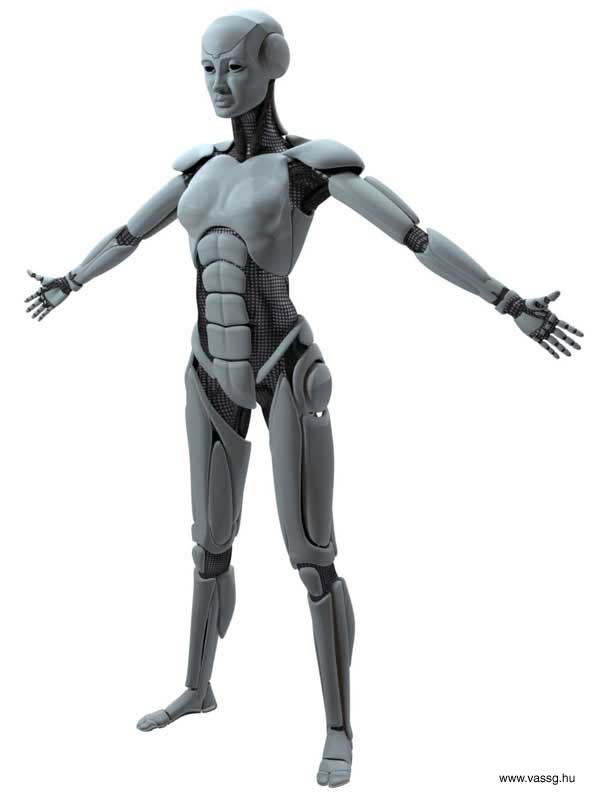
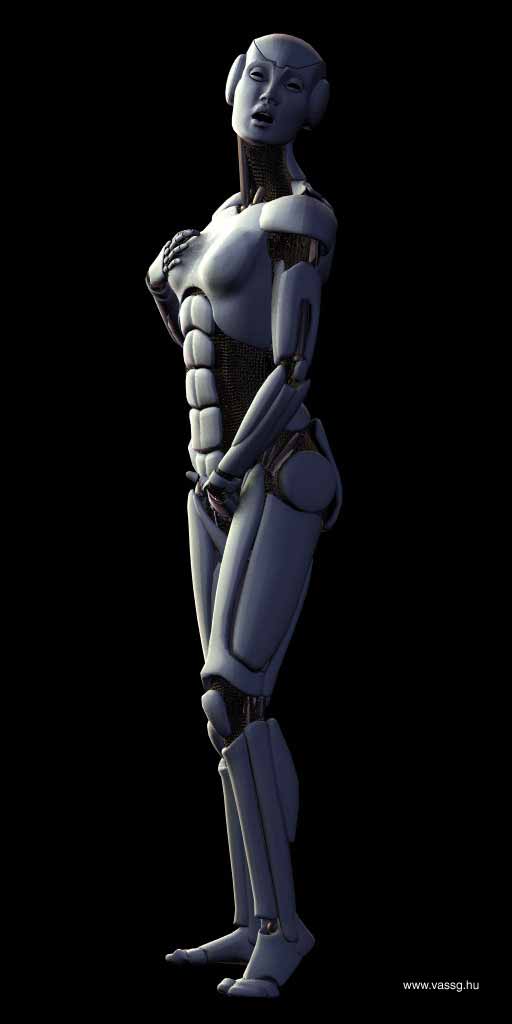
After the character designs the storyboard was developed, each live action and CG shot was represented by a hand-drawn picture. After that all images were scanned into a computer and edited together with the music, to set the timing of each shot. This way we could determine what to animate and render and what not. Modeling, character setupAll the 3D work was done in Alias Maya, the first steps were the modeling and character setup by CZG. Many times 3D animators and TDs make several different version of the same character capable of different moves, or having higher or lower resolution. In this project only one version existed of every model because of the time constraints. The first model was the female android. Throughout the design and modeling CZG heavily explored human anatomy references (for example the work of Barcsay), in order to achieve organic look even though the character consists only rigid elements. We have created stretching, MEL script driven muscle-like devices as well where the inner parts were not covered. The character setup was done the classical way, with the pelvis as root. At some parts (arse, belly, knee) the covering panels had to move differently as the bones, so they were driven by set-driven-keys. Blend shapes were used for the facial expressions of the android, there were (only) 26 controllers. The other, simpler characters had even less controllers.
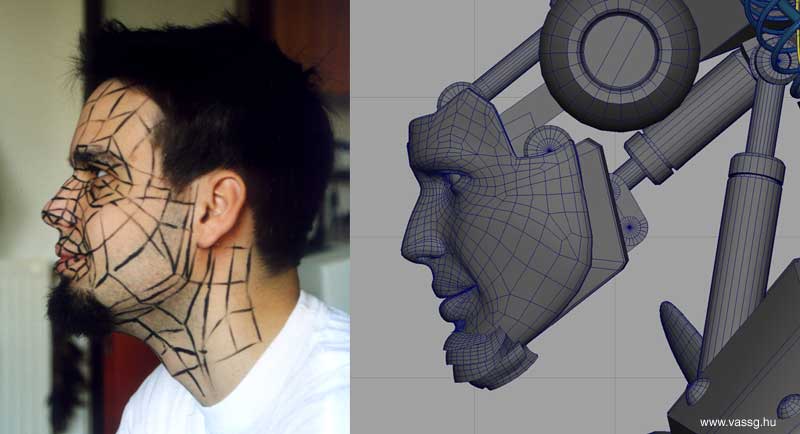
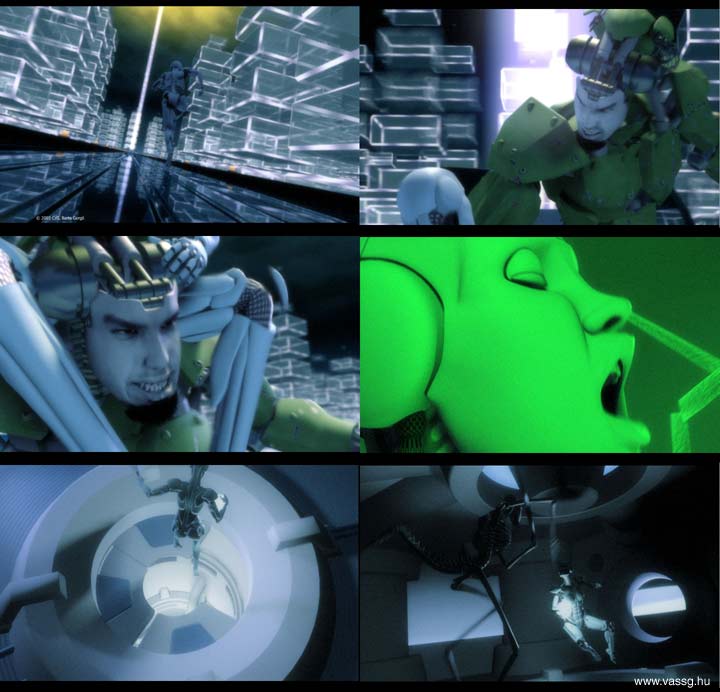
The second model was called Horrorbot, where the creation of the face was the toughest challenge. We wanted it to have the bands drummer's face but had no access to any 3D scanner. We simply painted the polygon topology on the musician's faces and took photographs (front, side). Using these references the models were created inside Maya.
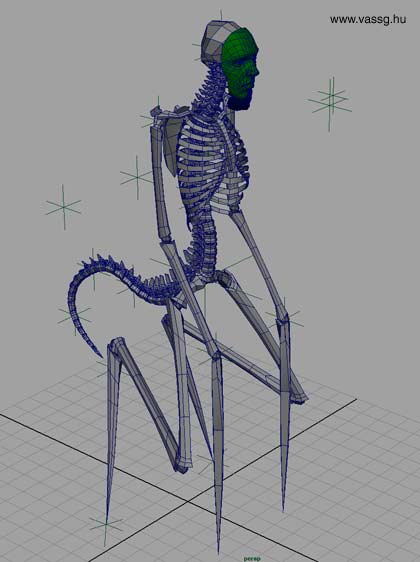
The skeleton-demon was much simpler than the previous ones, since it was made up of rigid bones. The modeling of the skeleton was quiet a challenge, we surely recommend it for hardcore modelers to practice. The arms of the characters were driven by two locators: the first controlled the orientation and position of the wrist, the second drove the elbow. Three controllers were attached to the legs: one for the knee, two for the foot.
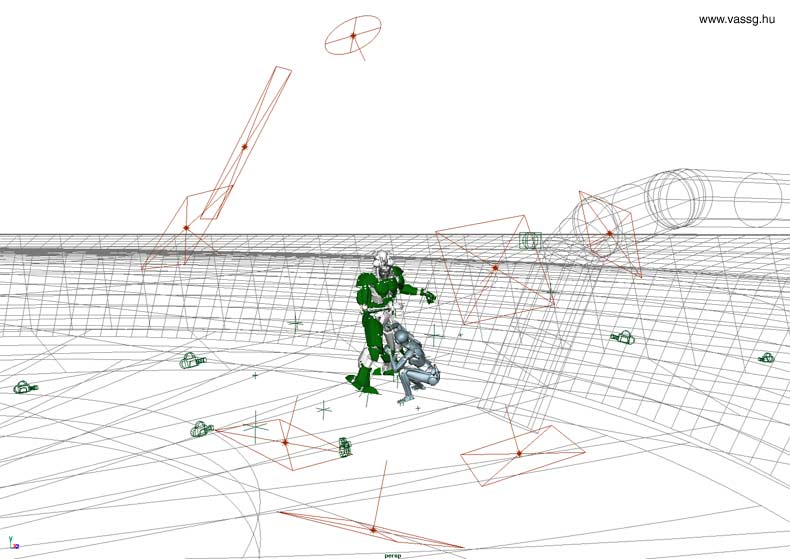
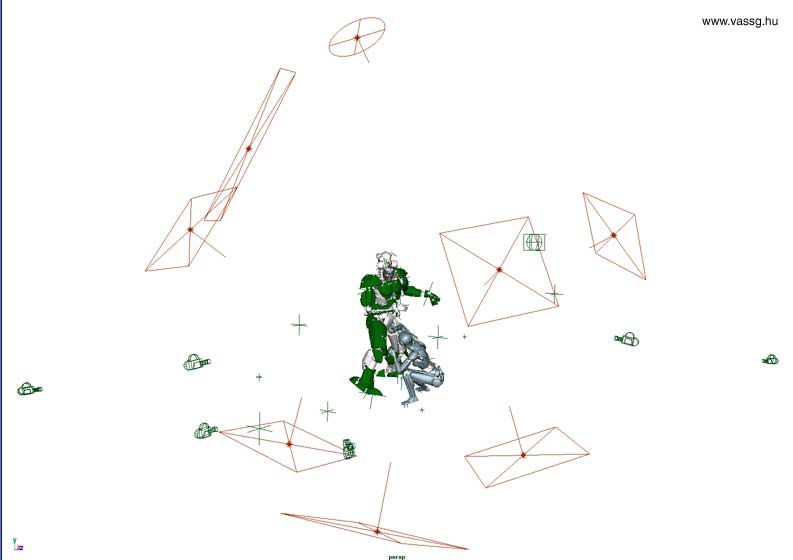
The reference videos were very useful for the animation. Two friends - who were kempo fighters - made all the necessary moves while we recorded it. At the first period of the production every shot was animated separately with custom camera move and background set-up. Unfortunately this way of working turned out to be way too slow, so we changed the method. The storyboard was modified to make it simpler, and the fight between the skeleton-demon and the android was animated continuously in a single file and multiple cameras were used for the rendering.
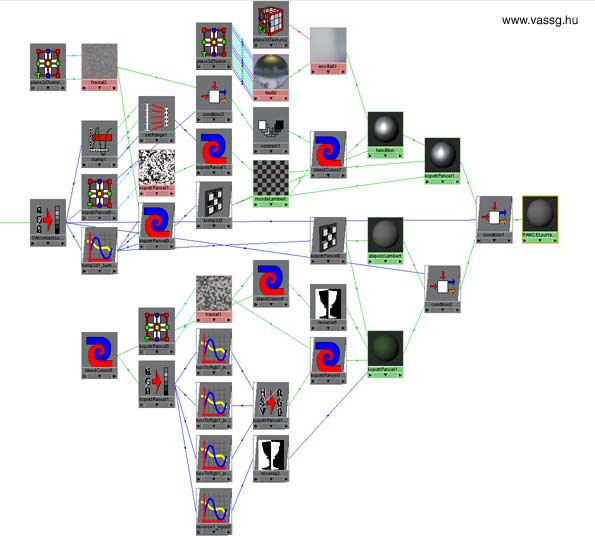
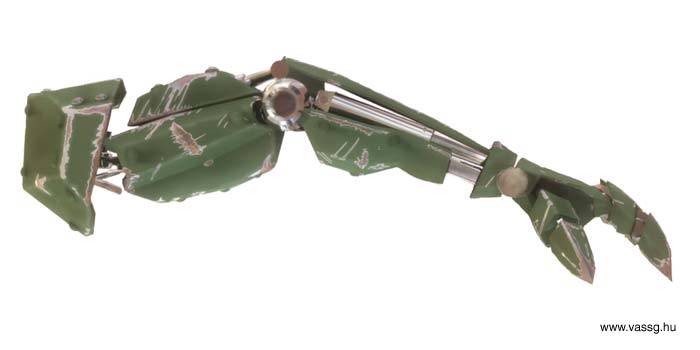
Using the flat-shaded version of the animations with the background in place Judit Czakó created an initial cut of the video. We needed this because we absolutely had no time to waste on rendering unnecessary shots. Based on the pre-cut video we determined the exact frames we needed - which were 25% of all animations we created- and rendered only those frames. The 172 sec movie had 120 shots... ShadingOne of the most complex shaders was the shading network of the HorrorBot, which was a tank like robot with scuffed painting. Just like all the materials this shader was created by Gergely Barta. Based in the concept this huge robot has been in combat for a long time, so its surface is scuffed and partly rusty counteracting the nice, clear and graceful body of the Android. Since we did not have the time to create multiple textures for color, bump or dirt channels we had to create a single texture driving all parameters of the shader. The damage, the scratches on the surface was proportional to the brightness: on bright areas the green paint was visible and as the texture gets darker, damages appear. First the metal gets visible, even darker areas there is also rust. This way the painting of the textures was like scratching the surface of the robot.
It was a challenge that the armor of the HorrorBot consisted of many parts each having it's unique texture. The shadingSwitch node proved to be very useful, since it allowed us to use the same shader with different textures for each part. Unfortunately there were multiple files with animation ready needed to be shaded, and it was extremely difficult for us to apply the shading network to the animated model - with the shading switch working properly. With the help of Gergely Vass the shader guy (Gergely Barta) created a script that managed the import of shader to any animated file containing the HorrorBot.
The look of the android's surface is significantly different from the original concept: the inner, flexible parts of her body were supposed to be like a material of woven metal strands. We had serious sampling issues, because the low PAL resolution and the thin lines of the texture caused ugly aliasing. We chose the simpler and faster way to overcome this issue and didn't use higher sampling or texture filtering, we just replaced the material with a simpler one.
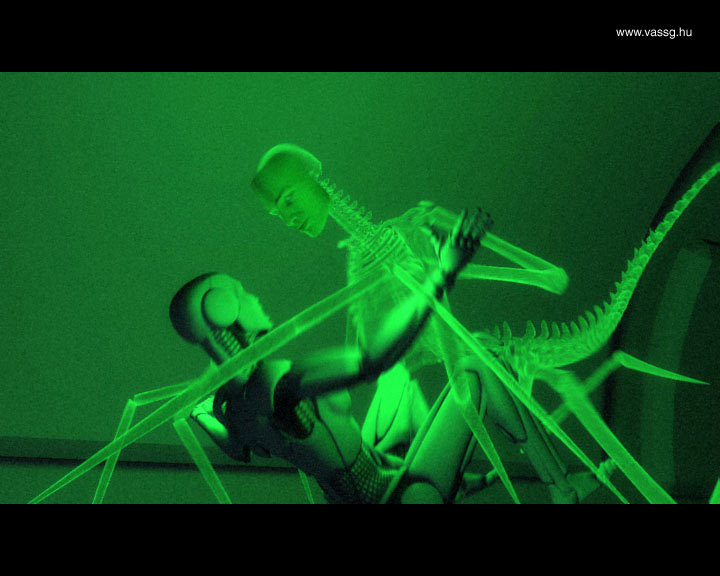
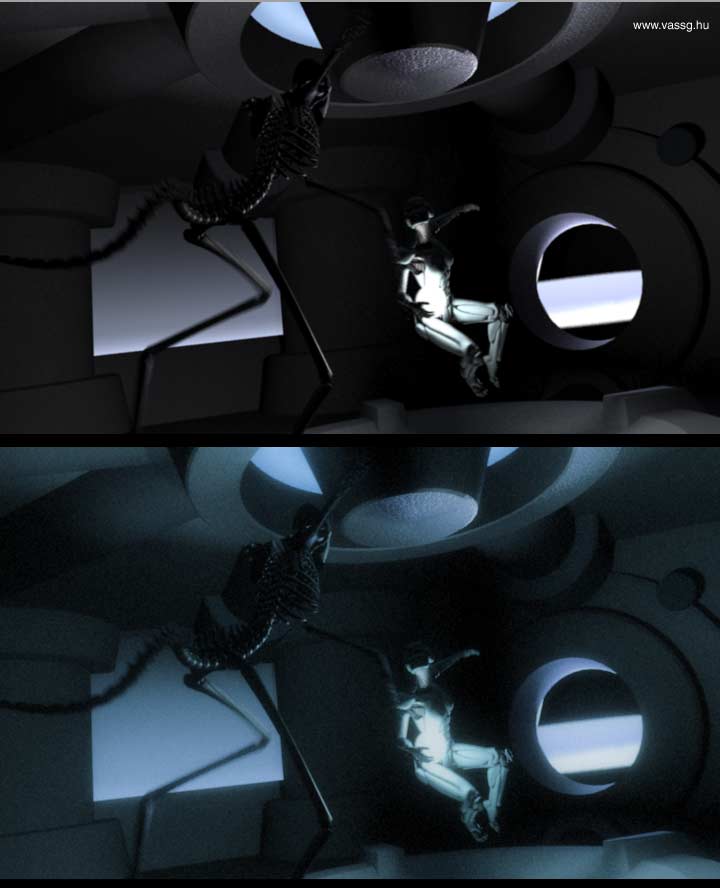
In the rest of the video there are two demons, one with cracked, corroded (but not rusty) metallic surface, the other with an X-ray like material. LightingThe first part of the video - where the action takes place outside of the hangar - the foreground and the background was lit separately. First we tried to use global illumination (Mental Ray final gathering) but soon rejected the approach, because we could control the lights more directly with simple lights and the standard local illumination renderer. All key and fill lights were area lights to achieve smooth look. The shadows were raytraced, thus they have very soft look (like there was light coming from all possible direction).
The "main data-stream" flowing up from the dome protected by the horrorBot and the halo around it served as the main light source. The light from the cloudy sky and from the equalizer-towers in the back was area light as well.
Since we had many static lights, in order to achieve shorter render times all shadows were baked in texture. The lights for the characters had at first the same position as the corresponding lights in the background files, but it turned out that the render time was very long because of the distant light sources. Finally we placed the lights closer to the characters and set their brightness and size to match the lighting of the background. The lamps placed closer representing the light coming from the background also made it necessary to move the light sources as the characters moved in the scene. It was like a real shooting of a movie, when the lighting technicians run along the actor holding a bounce card. The lights had to follow the android even during complex fighting and jumping moves.
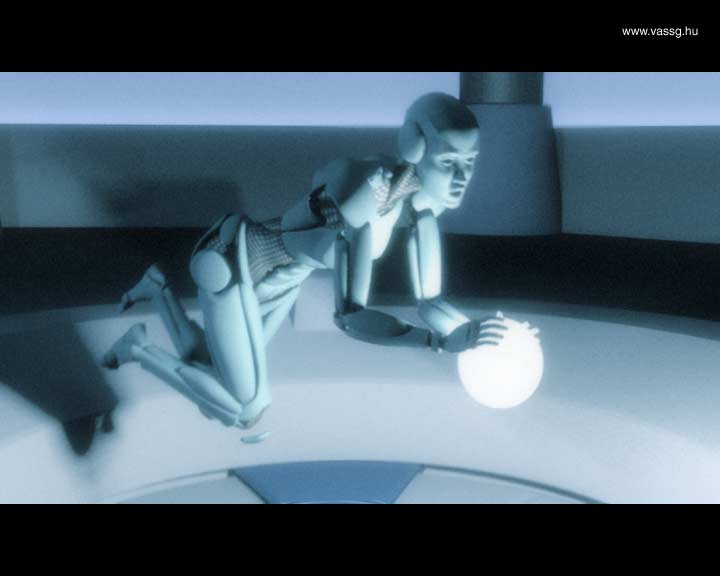
The scenes in the second part of the video were much smaller, thus we used the same lighting setup for the foreground and the background. In the room of the skeleton-demon the main light source was the cyber-egg, which the android tries to carry away through a passage in the floor. The lighting as well as the animation is very dynamic in this scene, since the cyber-egg is constantly moving and the light coming from the windows is changing as well. RenderingThis process was done by our colleagues called computers. Since they cannot write about their job - which is not exciting anyway - we just give one hint: we have come to the conclusion that it is very useful to play around the settings of the BSP tree of Mental Ray, since it might improve render times significantly.
To compensate the simplicity of the images we altered all images of the video in post: changed colors, brightness, contrast, focus/depth of field and added grain structure. Even though Mental Ray generates nice 3d motion blur we rarely used it to speed up rendering. We applied blur always in post, except the scenes with very fast motion where we couldn't get away with the fake motion blur. We also did not render real depth-of-field, it was applied in post as well. We generated the Z-depth for each frame, but unfortunately had some compatibility issues. We had to convert the Z files from floating point to 8 bit which caused much pain during compositing.
The original images coming from the renderer seemed to be a little "flat", so we did some simple color grading. We used different kind of color curves (for each color channel) to achieve a film-like look. The different scenes got their unique look while for example for all shots the dark colors have become a little bit greenish. We also animated to color curves when the lighting conditions changed. To create some nice glow effect we used a combination of simple filters (gamma, blur, brightness) and added film grain as well at the end. SummaryWell, that is how it was done. To judge the result of the plenty work we - especially Gergely "CZG" Cziráki - have spent on the project (9 months) is the viewers' task. As you can see it was an extremely low budget project, the work of 2 and a half people. We hope it might be a good inspiration for young 3D people to start a full CG project of their own.
|

Making of video
(storyboard, rough 3D and final render comparison)
18 mb MPG
18 mb MPG